

Hotline: 0902 360 448 / 0909 535 348

Product Categories
Hot Products
.jpg)

.jpg)
.jpg)
.jpg)
Access Statistics
Interfacing and Interlinings
At some point in any sewing journey we all have to get to grips with interlinings. It's just one of those things. Sometimes it's easy to work out what you need because the design you're following tells you exactly which interlining to use. Other times the design only specifies 'interlining' and it's left pretty much to your imagination.
So where do you go from there ?
I've put this post together based around questions that I get asked via the shop and I've included a PDF document (at the end) that gives a little more detail about equivalents (The USA and Europe have different manufacturers names for interlinings designed for the same purpose) which you may find useful.
So, what's the difference between the terms interfacing and interlining?
These terms are often used interchangeably nowadays. But strictly speaking interfacing is used to support 'facings', such as those around necklines or buttonholes and interlinings describe something that goes between an outer fabric and a lining fabric. ('inter' 'lining' - get it? he he!)
The function of both interlinings and interfacings is to support, stabilise and strengthen the main fabric. It will change the characteristics and behaviour of the fabric making it stiffer, more durable and suited to many more uses than before. Think about cotton being used to make fabric bowls and boxy style clutch bags.
Well, that seems straightforward enough so what's the confusion?
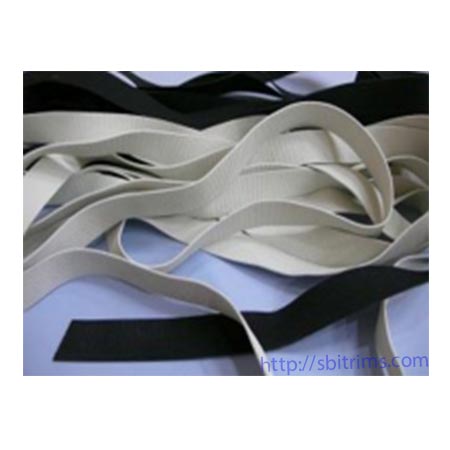
Interlinings come in different widths, different colours, cut off the roll, pre-packaged, as sew-ins, fusibles (single and double-sided), fleeces and wovens. They also come in different 'weights', meaning that they add different amounts of support and strength to the project it's being used in.
All that choice inevitably leads to confusion. Plus, across the world, manufactured interlinings designed to perform the same function have different trade names. Trade names such as Pellon in the US for example and Vilene in Europe.
Also, please note, before I get too carried away, that anything can be used as an interlining. A light cotton/muslin maybe all that some projects need and not manufactured interlinings at all. Many folk for example use curtain interlinings as a suitable interlining for light tote bags.
Why do different trade names pose a problem?
It's only a problem because we're so fortunate to have so many sewing patterns available to us from the across the English speaking world... plus all those gorgeous designs in books which have been translated for us.
But, (you knew there was a 'but' didn't you?) however well the sewing patterns have been written and supported it's often difficult (or not obvious) to know which is the most appropriate interlining to use, given the different manufacturers names for their interlinings. A US sewing pattern for example, will suggest a suitable Pellon but if you live in Europe these may not be available to you, so then what do you do?
Hooray! There is information out there to help so I've pulled it together and turned it into a PDF which covers a few of the interlinings you may come across.
So, why do I need to know so much about interlining?
Understanding or a least being aware of the difference an interlining can make to your finished project is a bit like knowing something of the 'tricks of the trade'. The beauty of interlining (as unappealing as it might look) is that it can mean all types of fabrics become available for making items they were previously unsuited for. Who would have thought it possible to use voile for bag making for example?
But there are so many different types of interlining?
Basically there are sew-ins, which are designed to be sewn into seams and are usually cut the same shape as the fabric piece it's being sewn to. They come in different weights; extra-heavy, heavy, medium and light and give light, medium, heavy etc support to the fabric it's being added to.
One thing to note about sew-ins is that they do not fray. So, if using a heavier weight interlining creates unwelcome thickness at seams then it is perfectly ok to trim the interlining back to the seam line in order to reduce bulk. For example if you're using a heavy interlining in a bag, you may wish to trim it away from side seams so as to get a nice flat top edge to topstitch around.
As well as sew-ins there are Iron-ons or fusibles. These interlinings have an adhesive on one or both sides and are 'fused'/bonded to the wrong side of the fabric using an iron and sometimes steam. The adhesive is heat activated and left to cool it forms a lasting bond with fabric.
(Note: Some fusible fleeces (aimed mainly at quilt makers) are designed for the adhesive to disappear after a first wash, so it's good to know which fusible you're using.)
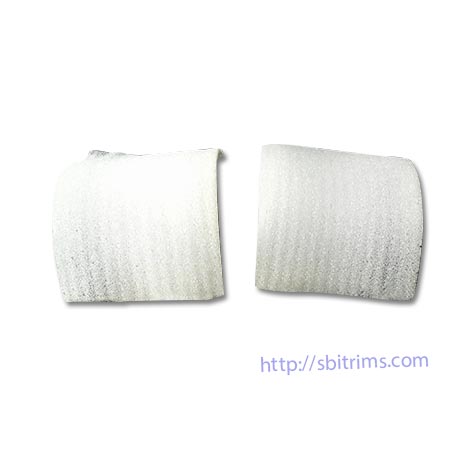
Fusible fleeces come in different 'lofts' or thicknesses. Both the medium and low loft fleeces add support and softness to your sewing. The higher the loft the thicker the fleece is and the more support and more definition it will give to your quilting stitches. The low loft fleeces are more suited to smaller projects, small bags, soft toys and items that don't require as much support.
Other iron-ons have an almost papery feel and are bonded to fabric in the same way as fusible fleeces by the use of an iron and occasionally a little steam. They also change the way the fabric feels giving a more papery feel.
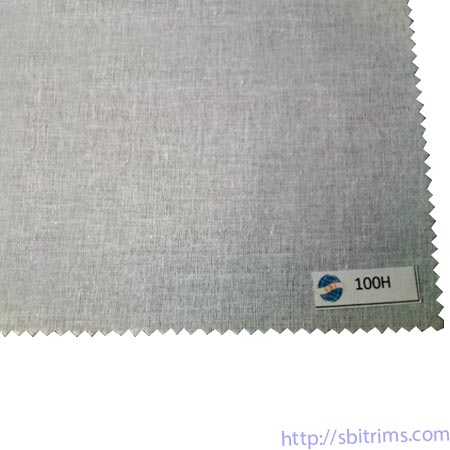
Wovens.... (I love these) These again are bonded to fabric with the use of an iron. They are cotton so they feel a little like fabric but the grainy feeling side is the side with the adhesive on. It bonds readily with fabric and because it has a bias in the same way that fabric has, supports the fabric but still drapes beautifully.
This isn't intended as a definitive guide to interlinings. It is just intended to help point you in the right direction and perhaps clear up a few questions for you. The question of which Interlining seems almost unanswerable when you first start out sewing but at the end of the day the best advice to follow until you develop your own interlining preferences (It will happen, I promise.), is to follow the recommendations on the sewing pattern you are following.
If you want to see how to apply/fuse a specific interlining to a fabric then this link (the Vilene site) will give you access to some short videos' showing just how it's done (Oh! and you don't need to understand German... or even English for that matter.)
Now, here's the link to the file I promised at the beginning Download Interlinings
When you get to feel really confident with what you're using... you'll be able to mix different interlinings together, fleeces and sew-ins ands really create the amount of support you want... but that's all for later.
I really hope you find this useful.